Manage Person Workflow
This Lab walks you through the creation of a complete workflow (Demo Manage Person Workflow) with the following major components and controls:
Components and Controls:
- Lookup Controls
- Forms
- Activities
- Update Group RBAC Membership Activity
- Update Management Role Membership
- Operation Base Activities
- Autocomplete List Control
- DataGrid Control
Objective
Develop a workflow that enables users to modify person attributes, add a person to groups, and assign a person to management roles.
User ID: Test
Password: P@$$w0rd
Steps
-
Start the 20331B-NYC-DC-05 virtual machine. Wait for the virtual machine to display the Desktop.
-
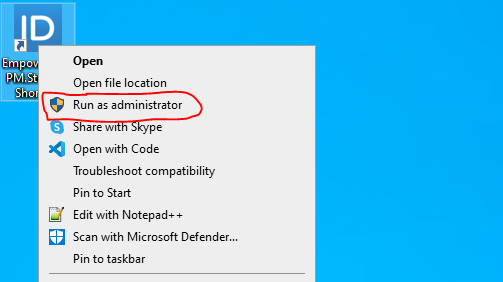
On your Desktop, Right-click Workflow Studio (WFS), and then click Run as administrator.
-
Wait for WFS to start and enter your credentials.


-
In Solution Explorer, right-click on the Developer Packages folder, create a new folder called DemoLabs, and click the Ok button.

-
Add New Folder dialog box will appear; select:
- User Interface > Lookup Control
- User Interface > Forms
- Workflows > Applications
Click Ok.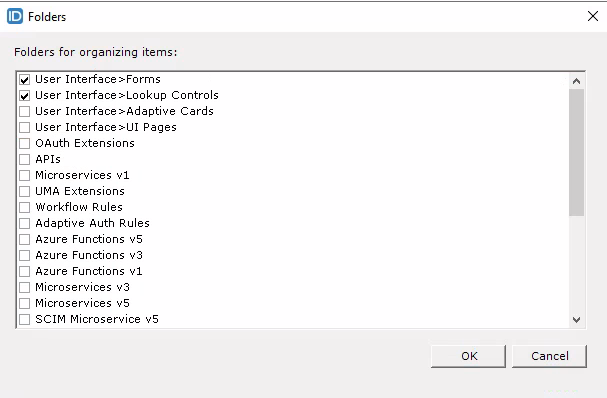
Lookup Control (Person)
-
Expand Developer Packages > DemoLabs > User Interface, right-click on the Lookup Controls folder, hover over New User Interface, and click Lookup (Person).

-
Wait for the Lookup designer to load.
-
Click Save and name it DemoPersonSingleLookup.

-
On your lookup control set the following properties
- Component Object: PersonView
- Data Method: GetAllSearchAdvanced method with resourceTag as a parameter.
- Decisions: Next
- Set Grid Type: Person
- Type: Single
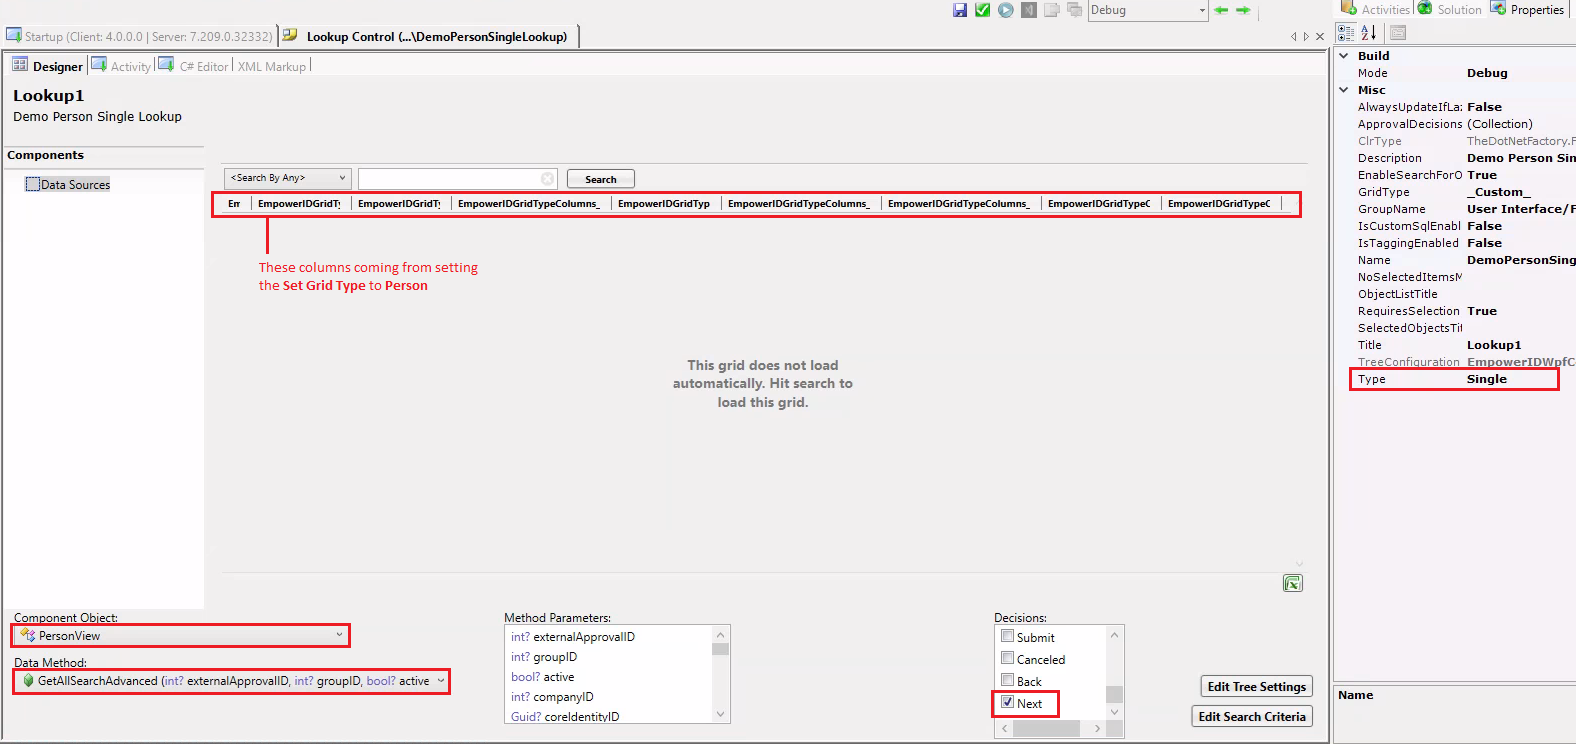
- Publish your Lookup Control.
Form
- Create a form and do the following configurations on it.
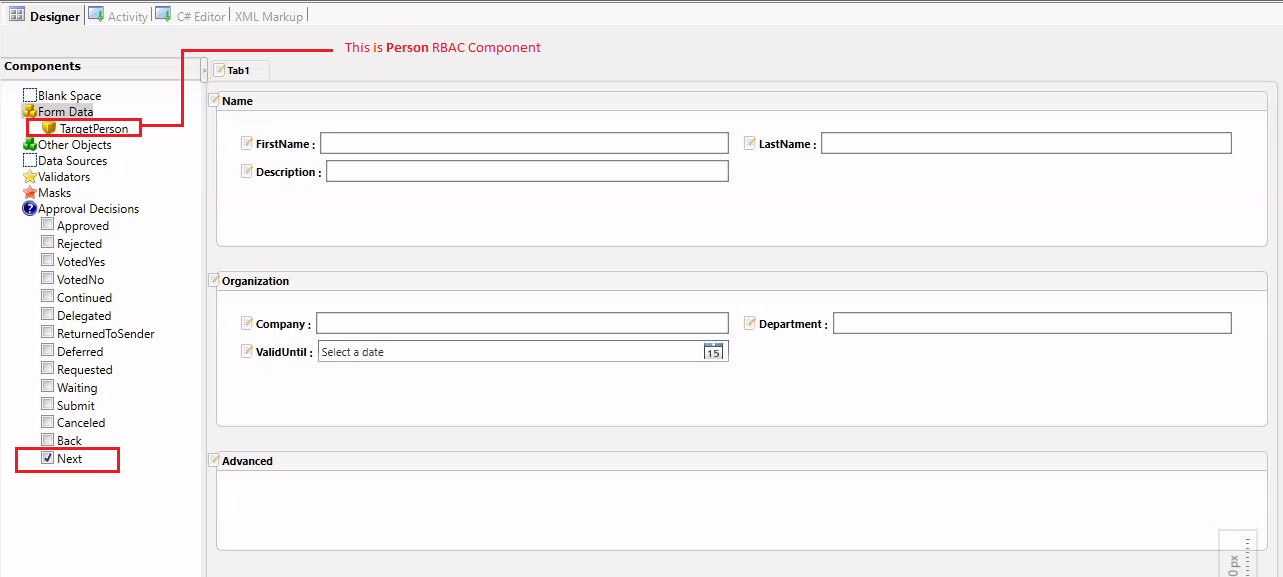
Sections: Add three sections (Name, Organization, Advanced)
RBAC Components: Person (rename it to TargetPerson)
First Section (Name): Drag these fields FirstName, LastName, Description
Second Section (Organization): Drag these fields Company, Department, ValidUntil
Third Section (Advanced): Keep it empty for now.
Approval Decision: Next

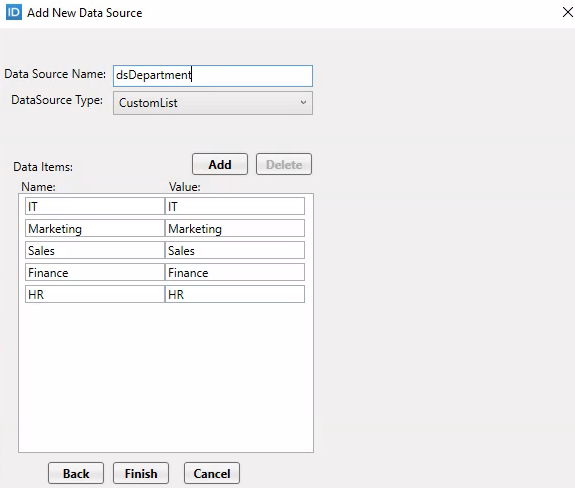
- Right-click on Data Sources and select the Add Data Source option. Keep the Create New Data Source option selected, then click Next. In the Data Source Name textbox, provide a name for your datasource (e.g., dsDepartment). From the DataSource Type dropdown, select the CustomList option, and add the following values.
| Name | Value |
|---|---|
| IT | IT |
| Marketing | Marketing |
| Sales | Sales |
| Finance | Finance |
| HR | HR |
-
Click on the Finish button.
-
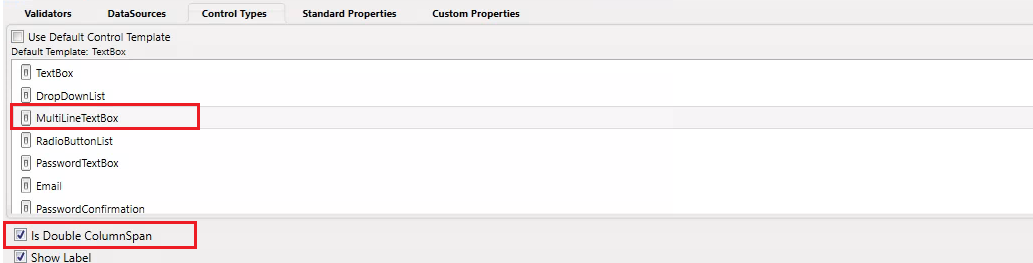
Right-click on the Description field, select the Edit option, go to the Control Types tab, and choose the MultiLineTextBox option. Check the Is Double ColumnSpan option and click OK.
-
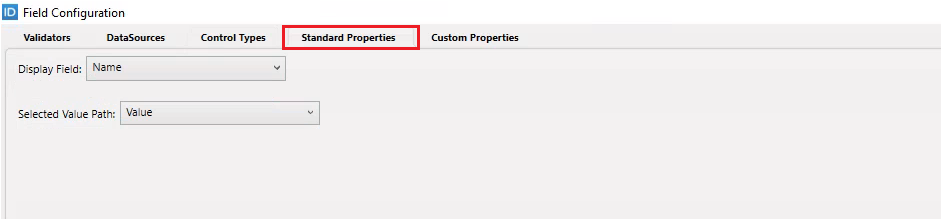
Right-click on the ValidUntil field and click on the edit option and go to the Standard Properties tab and set the following properties.
Min Date: 15 -----> (It implies that the earliest selectable date from the calendar control will be 15 days beyond the current date.)
Max Date: 30 -----> (It signifies that the maximum selectable date from the calendar control is set at 3 months beyond the current date.)
Default Value: 90


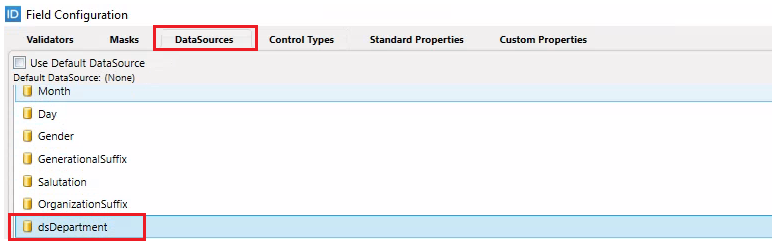
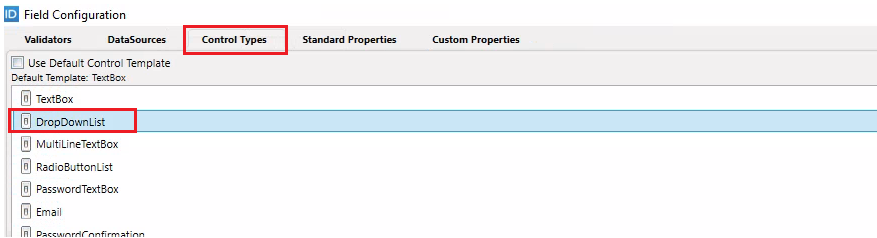
- Right-click on the Department field, select the Edit option, go to the DataSources tab, and uncheck the Use Default DataSource option and select the dsDepartment. Navigate to the Control Types tab and uncheck the Use Default Control Templates and select the DropdownList. Now navigate to the Standard Properties tab and in the Display Field dropdown select the Name and in the Selected Value Path dropdown select the Value. Click Ok button.
- Create an object of type boolean and rename it to EditManagementRoleMembership.


-
Now drag the EditManagementRoleMembership object to Organization’s section
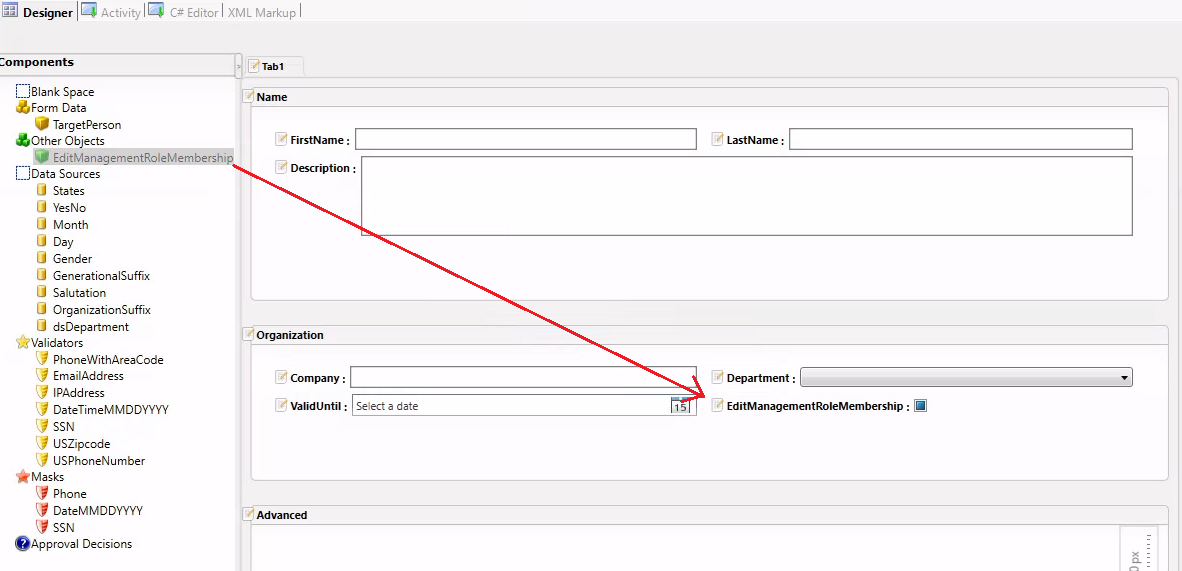
-
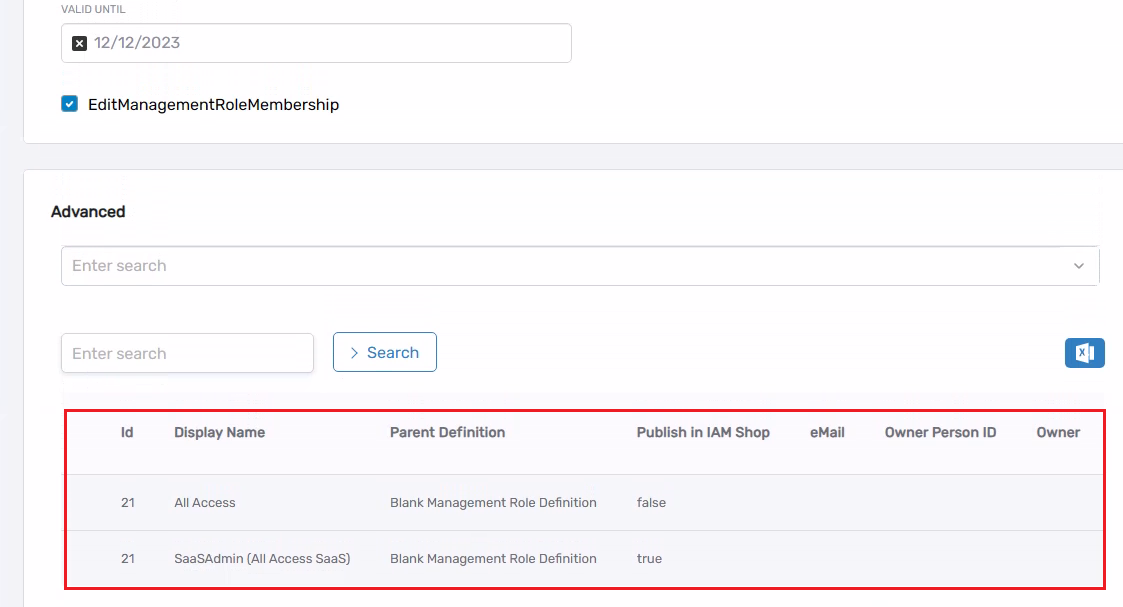
Right click on the Advanced section and click on Edit option.
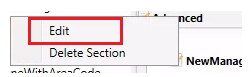
-
Set the Bind Visibility to Control Value dropdown to EditManagementRoleMembership

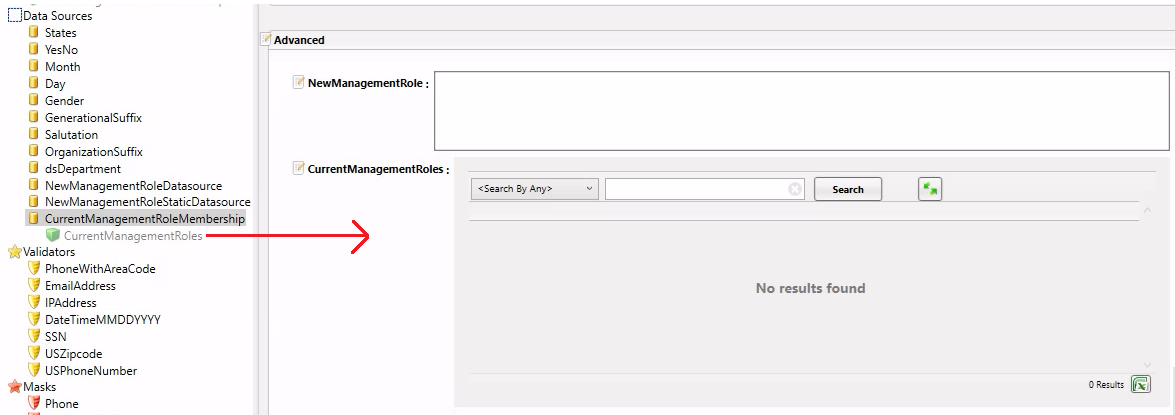
Now, within our third section titled Advanced, I will incorporate two controls.
- The first is an autocomplete control designed to showcase the ManagementRoles that a person is not currently associated with.
- The second is a DataGrid control intended to display the ManagementRoles to which a person is already affiliated.
-
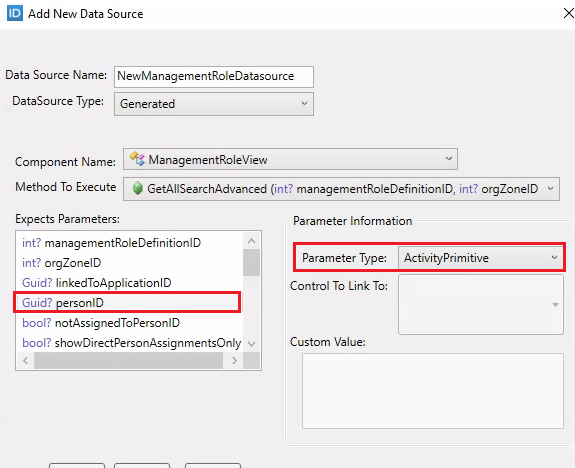
Right-click on Data Sources and select the Add Data Source option. Keep the Create New Data Source option selected, then click Next. In the Data Source Name textbox, provide a name for your datasource (e.g. NewManagementRoleDatasource). From the DataSource Type dropdown, select the Generated option, in the Component Name select the ManagementRoleView and in the Method To Execute select the GetAllSearchAdvanced with the maximum number of parameters.
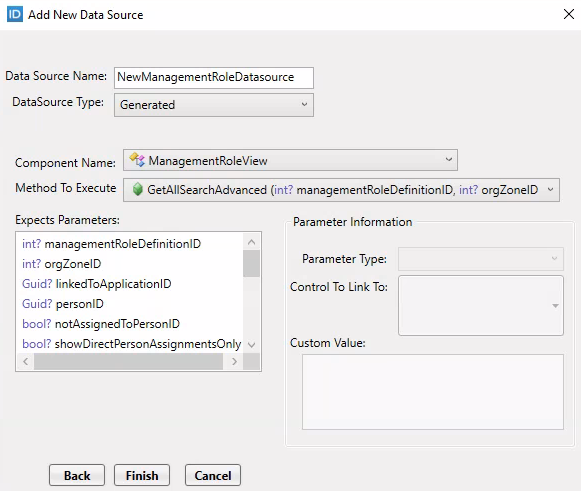
-
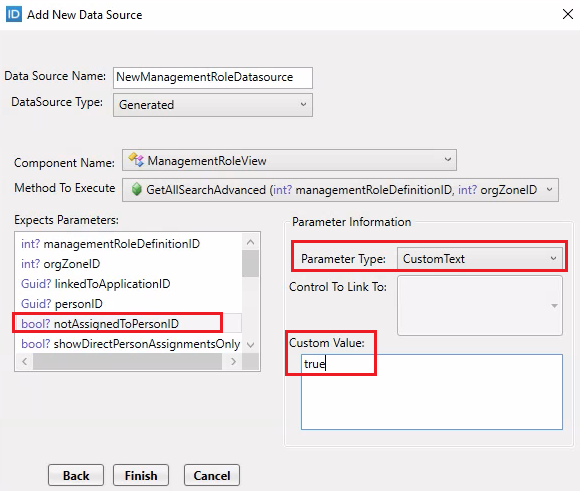
Select the personID parameter and set the Parameter Type to Activity Primitive. Additionally, select the notAssignedToPersonID parameter, set its Parameter Type to CustomText, and input true in the Custom Value textbox. Click on the Finish button.
-
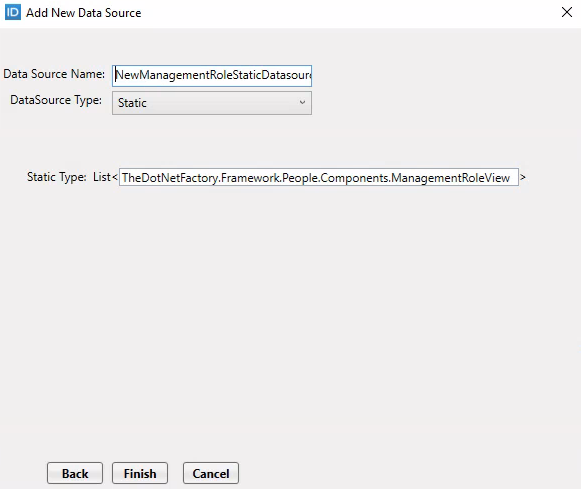
Right-click on Data Sources and select the Add Data Source option. Keep the Create New Data Source option selected, then click Next. In the Data Source Name textbox, provide a name for your datasource (e.g.NewManagementRoleStaticDatasource). In the DataSource Type select Static and in the Static Type List< write this code TheDotNetFactory.Framework.People.Components.ManagementRoleView and click on the Finish button.
-
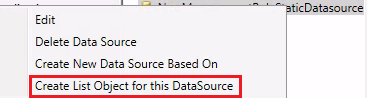
Right-click on the NewManagementRoleStaticDatasource and select the Create List Object for this DataSource option. Double click on the ListObject1 and rename it to NewManagementRole.
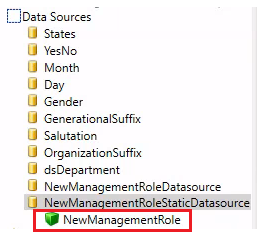
-
Now drag and drop the NewManagementRole onto the Advanced section.
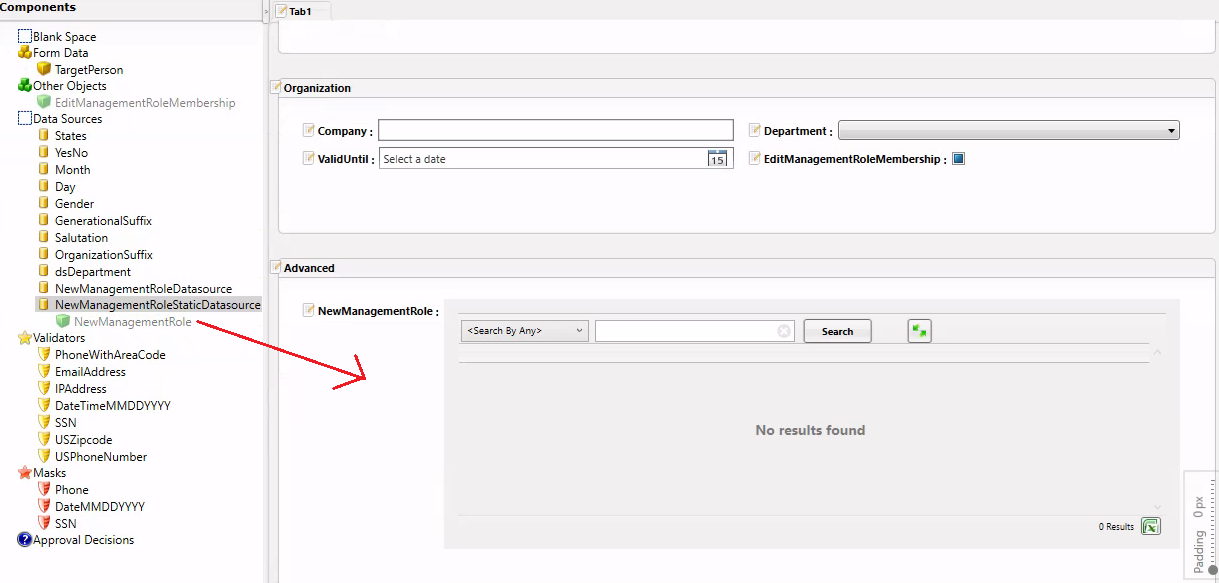
-
Right-click on the NewManagementRole grid and click on edit and go to the Control Types tab and select the AutocompleteList.

-
Go to Standard Properties tab and fill out the values as per below.
- Display Field: FriendlyName
- Selected Value Path: ManagementRoleID
- Item Template Name: EidAutoCompleteManagementRole
- Search Parameter Name: textToSearch
- View One Link Type:
- DataSource: NewManagementRoleDatasource
- SearchByColumns:
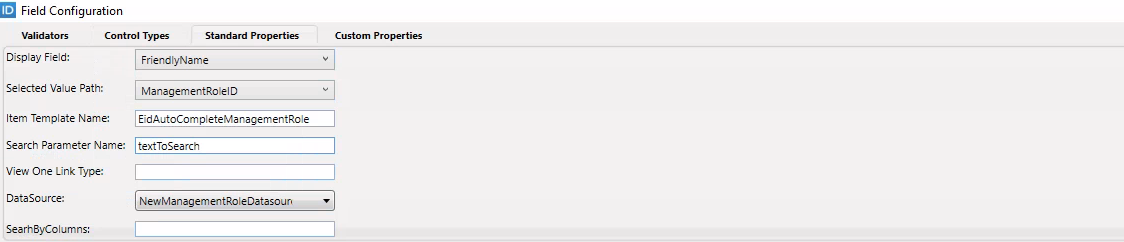
- Click Ok.
We employed the NewManagementRoleStaticDatasource to facilitate the search for management roles within an autocomplete control. In contrast, the NewManagementRoleDatasource has been utilized for the submission of data back to the database.
-
Right-click on Data Sources and select the Add Data Source option. Keep the Create New Data Source option selected, then click Next. In the Data Source Name textbox, provide a name for your datasource (e.g.CurrentManagementRoleMembershipDatasource). From the DataSource Type dropdown, select the Generated option, in the Component Name select the ManagementRoleView and in the Method To Execute select the GetAllSearchAdvanced with the maximum number of parameters.

-
Select the personID parameter and set the Parameter Type to Activity Primitive. Additionally, select the showDirectPersonAssignmentsOnly parameter, set its Parameter Type to CustomText, and input true in the Custom Value textbox. Click on the Finish button.

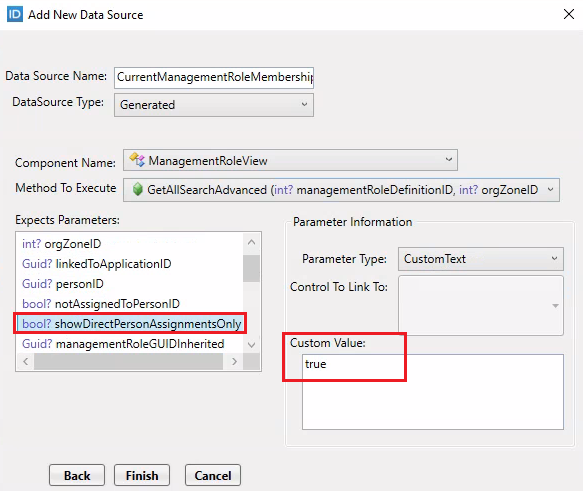
@ShowDirectPersonAssignmentsOnly - If true, will include only direct assignments to person, otherwise any path. @NotAssignedToPersonID - If true, returns management roles the person does not have. If false, returns the ones the person has. Not used if the person is null.
-
Now we need to create an element in order to drag it onto our form and to do that Right-click on the CurrentManagementRoleMembershipDatasource and select the Create List Object for this DataSource option. Double click on the ListObject1 and rename it to CurrentManagementRoles.

-
Drag and drop the CurrentManagementRoles under the Autocomplete Control.
-
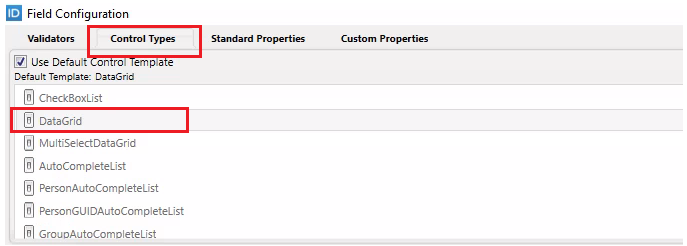
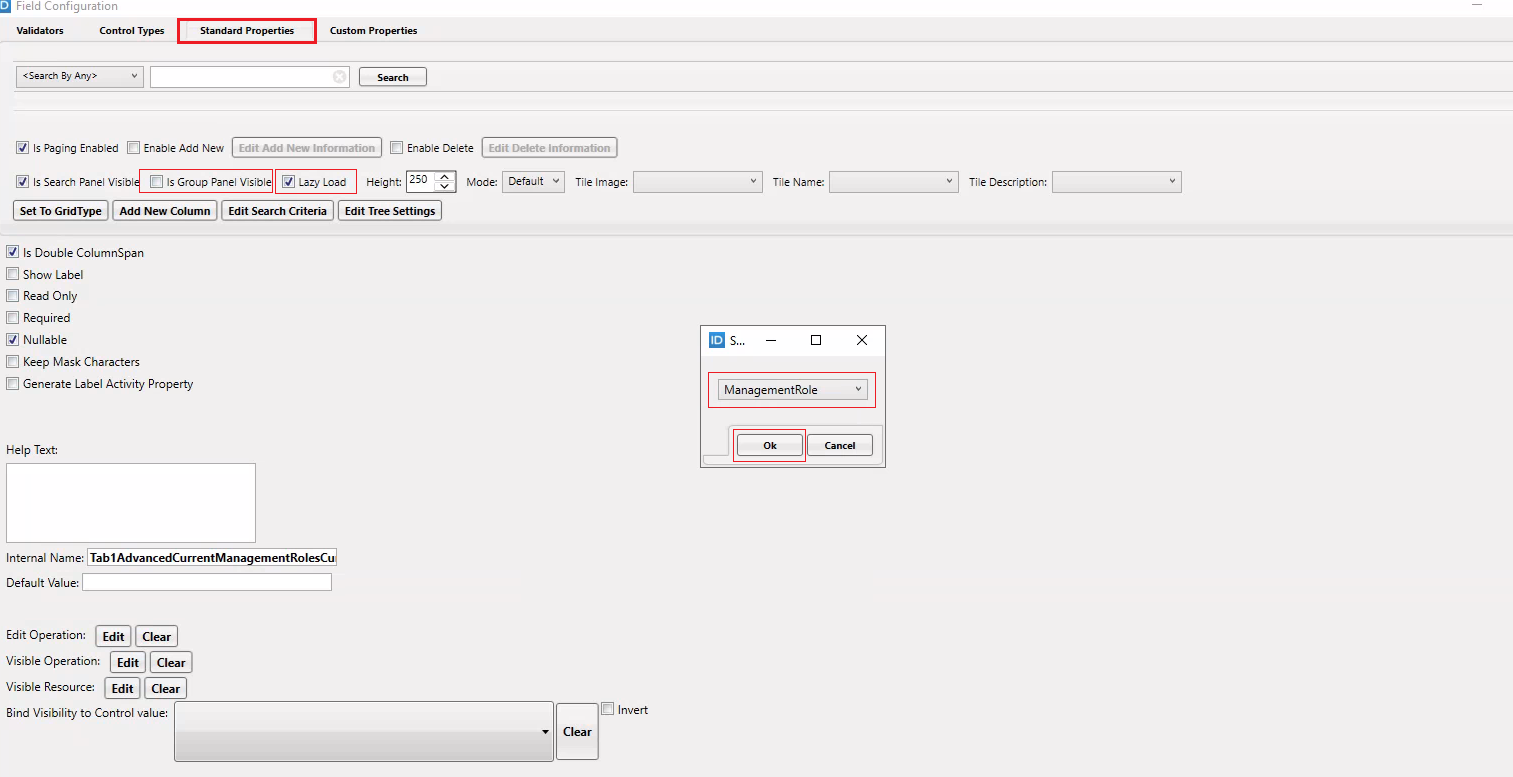
Right-click on the CurrentManagementRoles grid, select the Edit option, navigate to the Control Types tab, ensure that DataGrid is selected, and then proceed to the Standard Properties tab. In the Standard Properties tab, uncheck the Is Group Panel Visible option, checkmark the Lazy Load option, and click on Set To GridType to select ManagementRole. Click Ok.
Lookup (Groups)
- Create a Lookup Control
- Click on the Save button to save your Lookup and give it the name DemoGroupsMultiLookup.
- On your lookup control set following properties
- Component Object: GroupView
- Data Method: GetAllSearchAdvanced method which has resourceTag as a parameter.
- Decisions: Submit
- Set Grid Type: Group
- Type: Multiple
- Title: Show All Groups
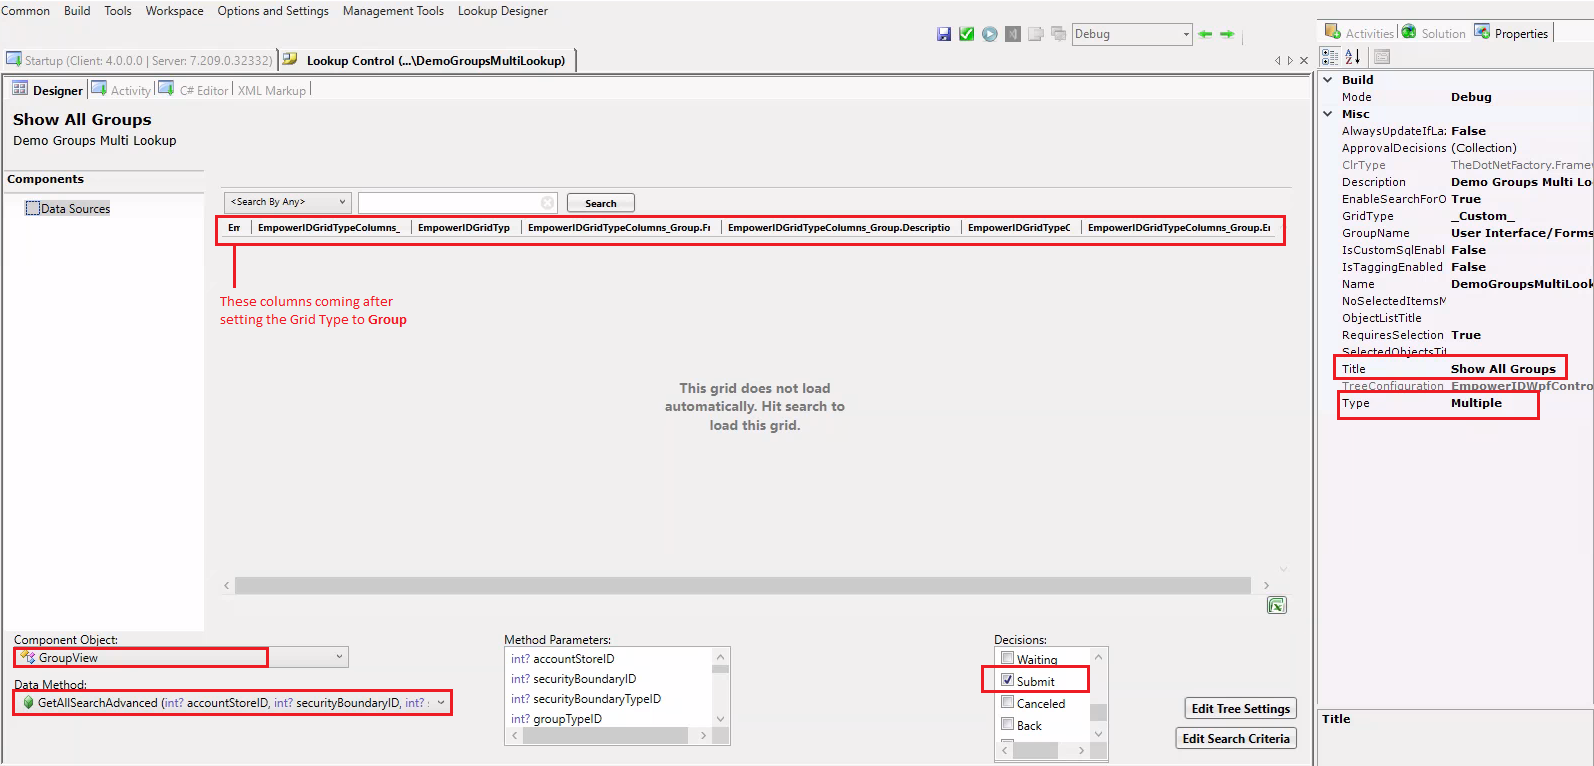
- Publish your lookup control.
Workflows
-
Create a workflow, save it, and give it a name, DemoManagePerson.
-
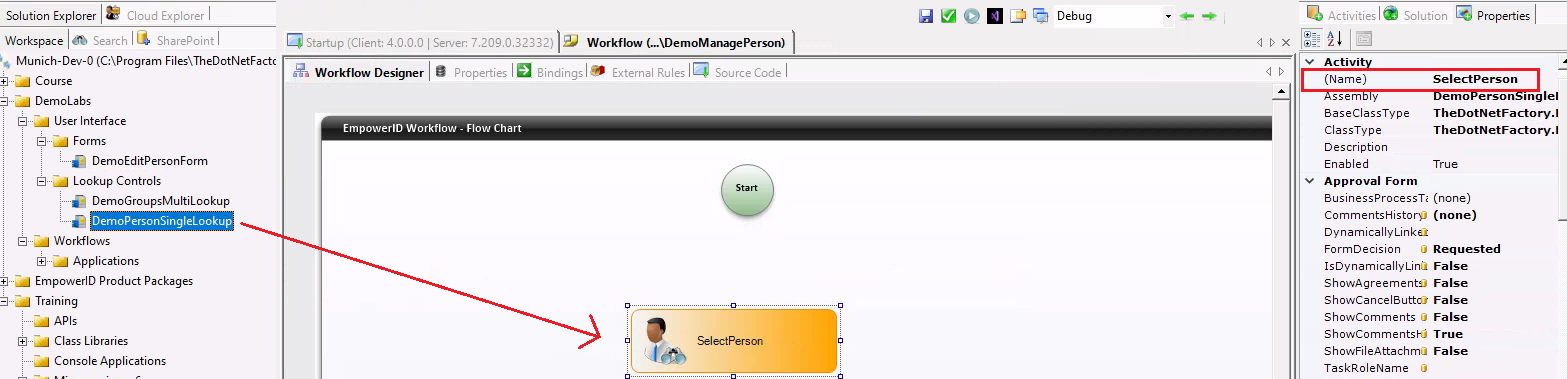
Drag and drop your lookup control (DemoPersonSingleLookup) onto the Workflow Designer pane. In the Name property type SelectPerson.
-
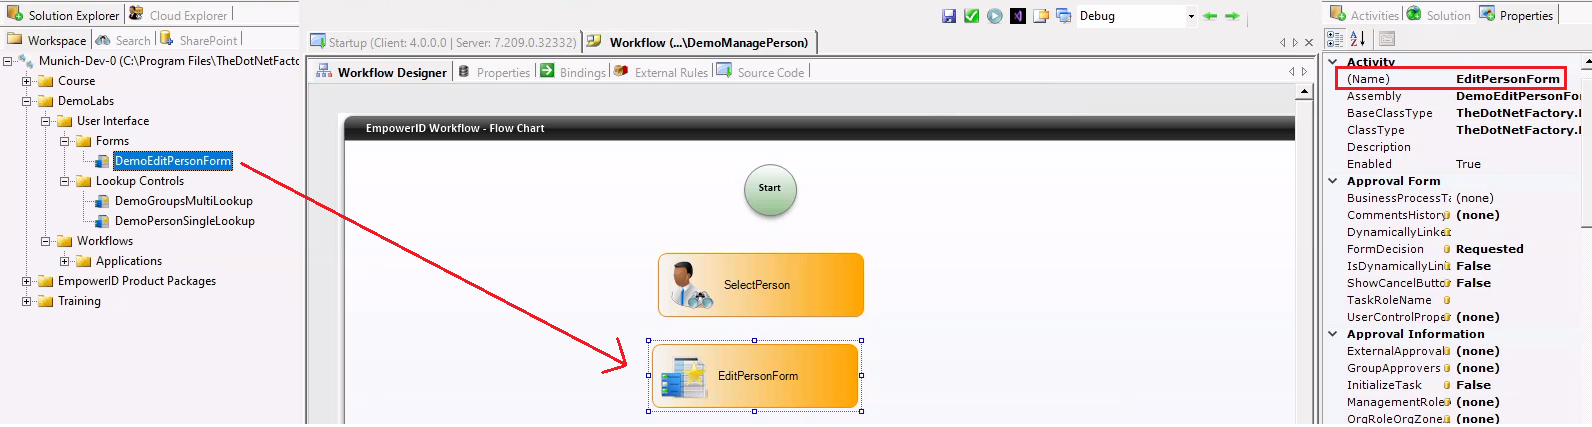
Drag and drop your form (DemoEditPersonForm) onto the Workflow Designer pane. In the Name property type EditPersonForm.
-
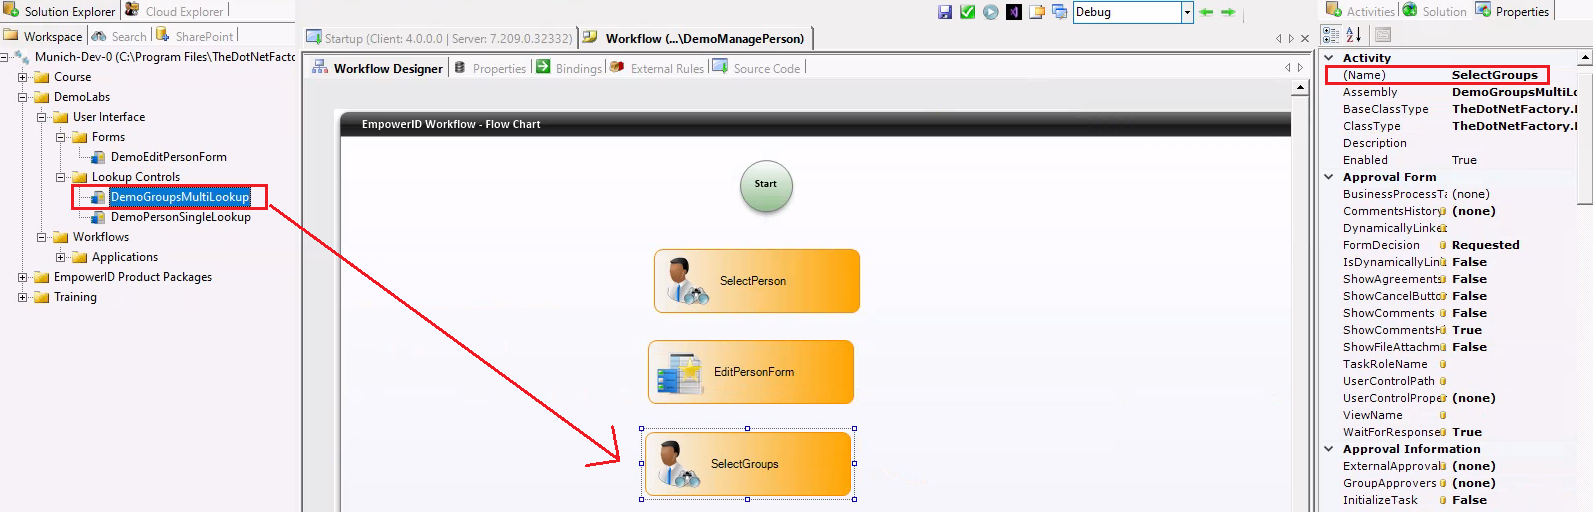
Drag and drop your lookup control (DemoGroupsMultiLookup) onto the Workflow Designer pane. In the Name property type SelectGroups.
-
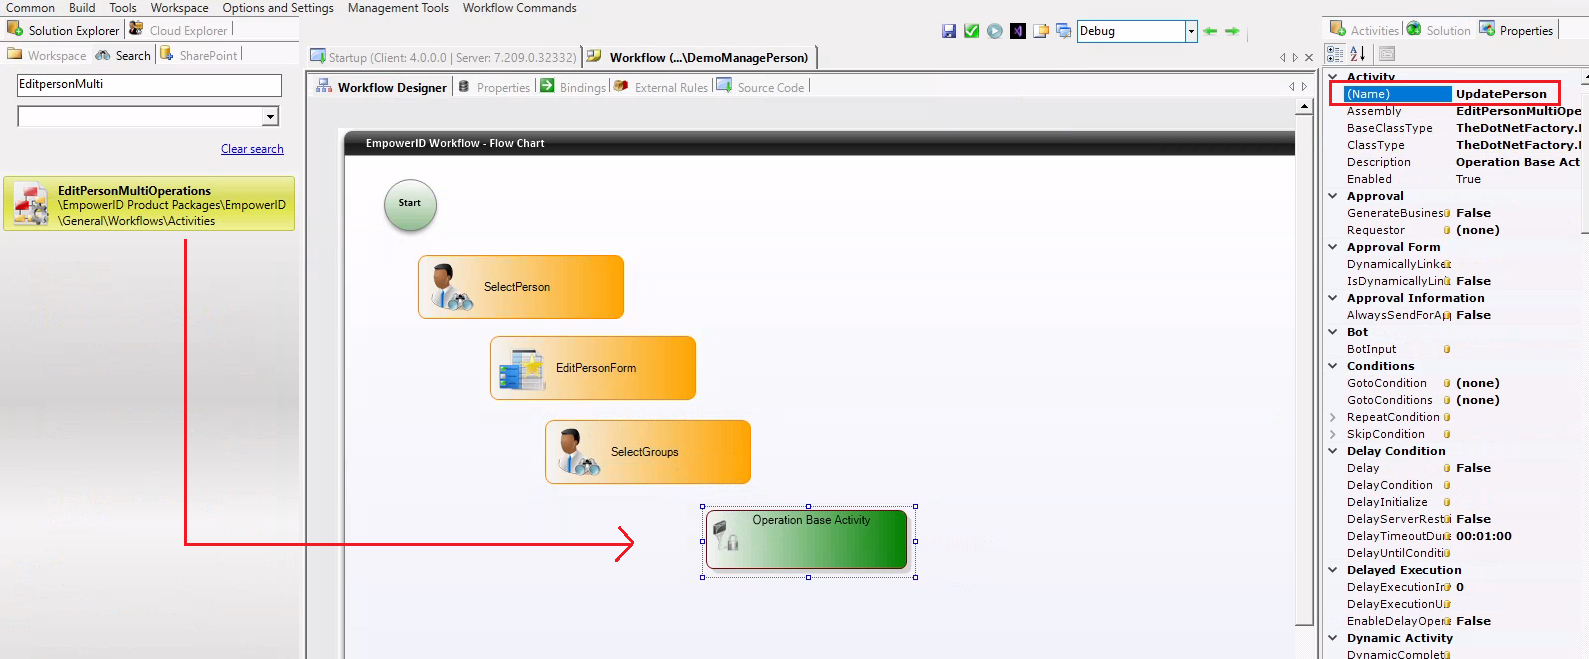
Drag and drop operation base activity (EditPersonMultiOperations) onto the Workflow Designer pane. In the Name property type UpdatePerson.
-
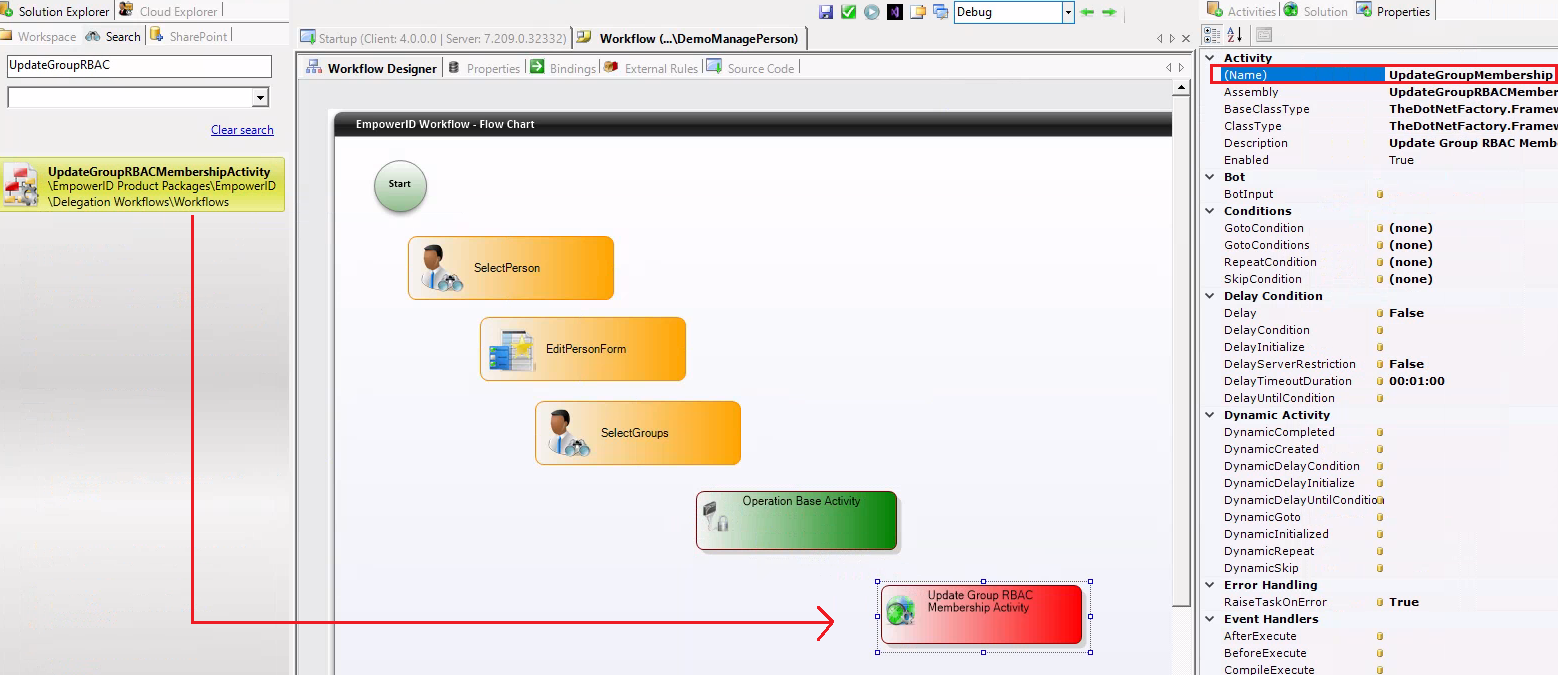
Drag and drop an Activity (UpdateGroupRBACMembershipActivity) onto the Workflow Designer pane. In the Name property type UpdateGroupMembership.
-
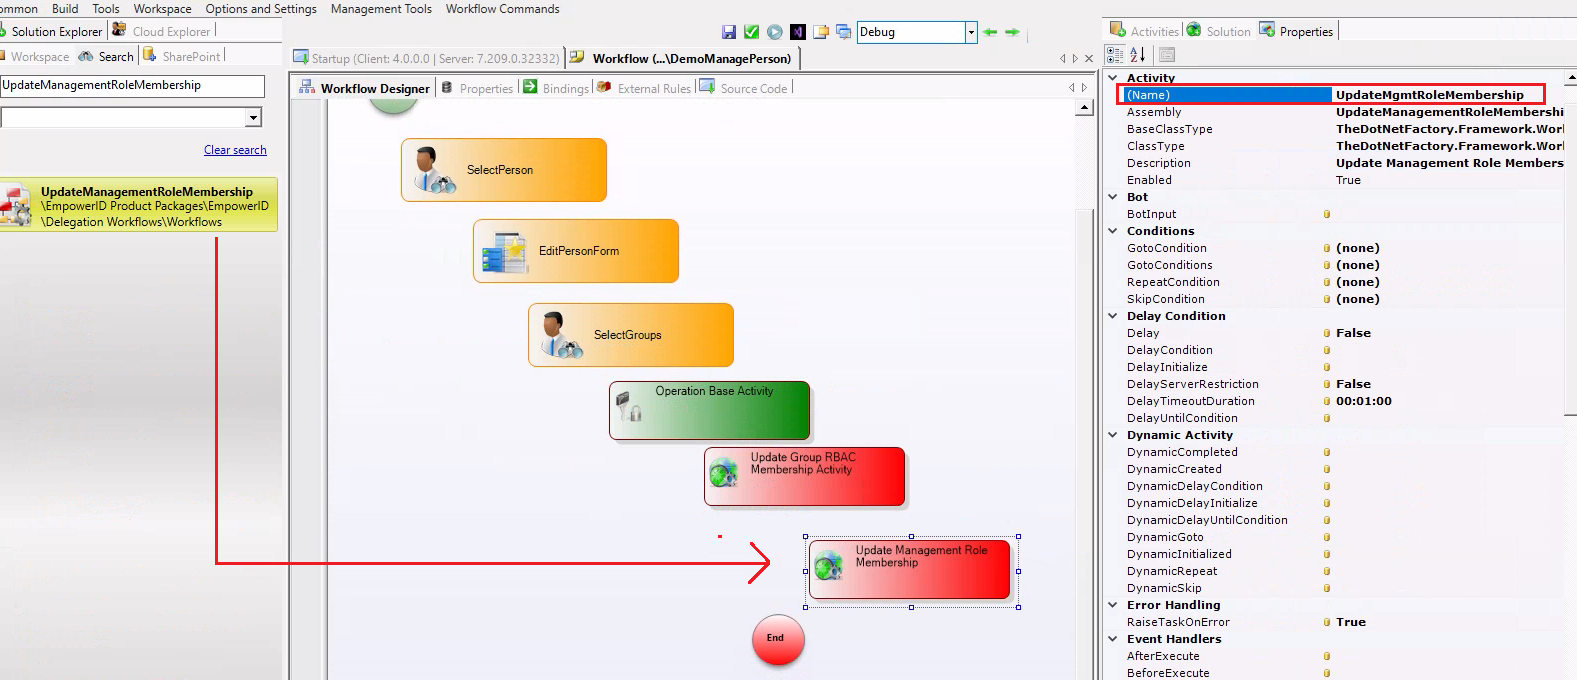
Drag and drop an Activity (UpdateManagementRoleMembership) onto the Workflow Designer pane. In the Name property type UpdateMgmtRoleMembership.
-
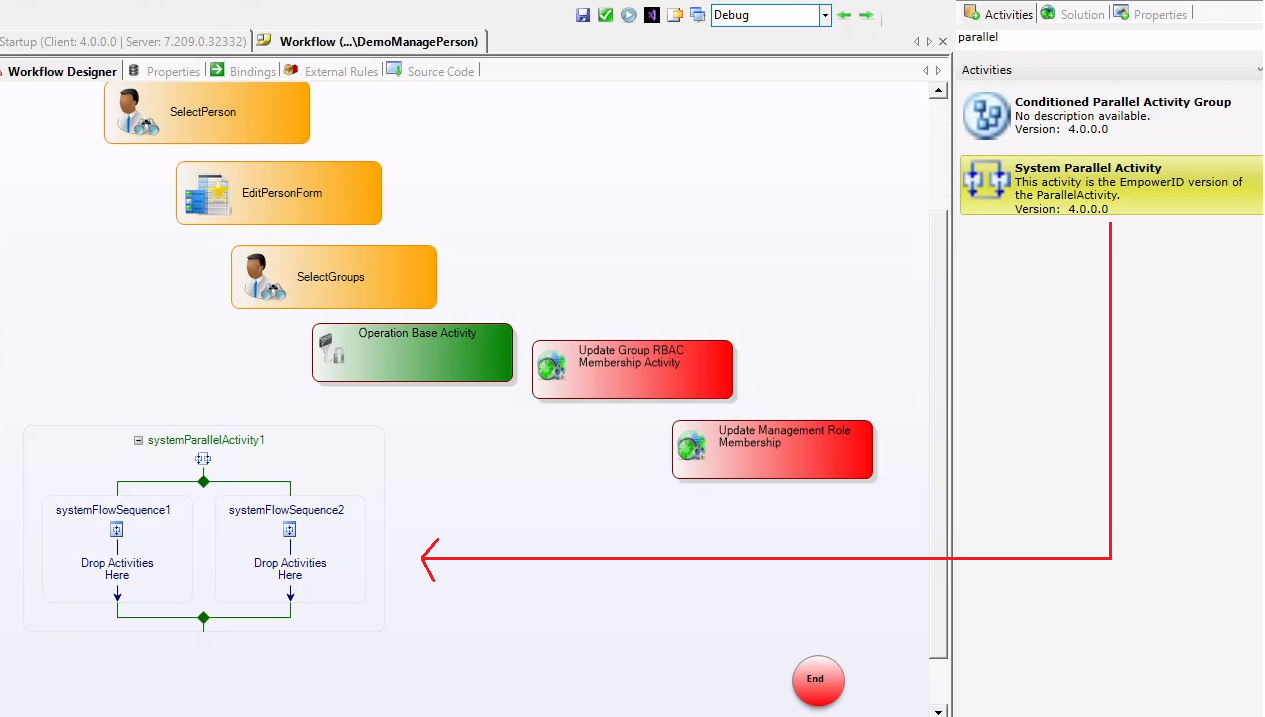
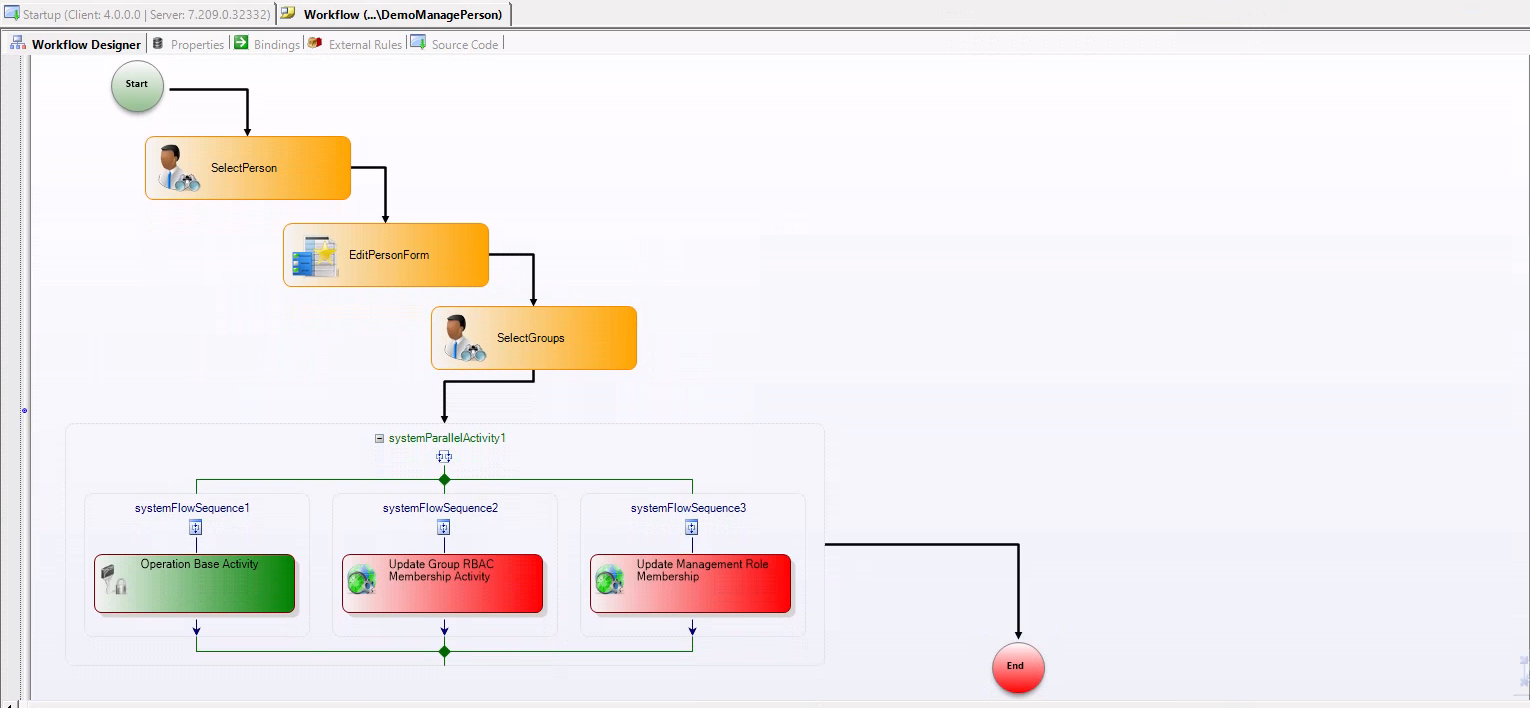
Drag and drop an Activity (System Parallel Activity) onto the Workflow Designer pane.
-
Right-Click on the System Parallel Activity and click on the Add Branch option. It will add another branch into the System parallel Activity


-
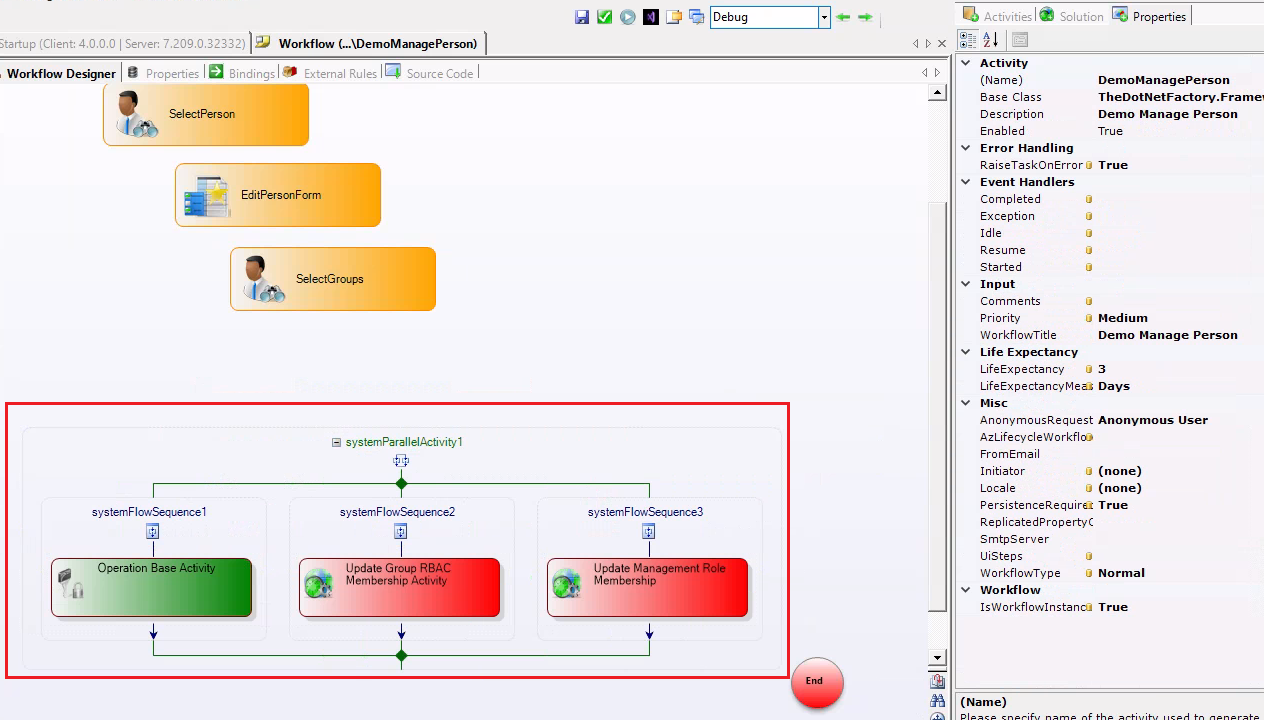
Now drag your UpdatePerson operation base activity into the first branch and UpdateGroupRBACMembership activity into the second branch and UpdateMgmtRoleMembership into the third branch.
-
Now Connect all activities with a line as shown in the provided image.
-
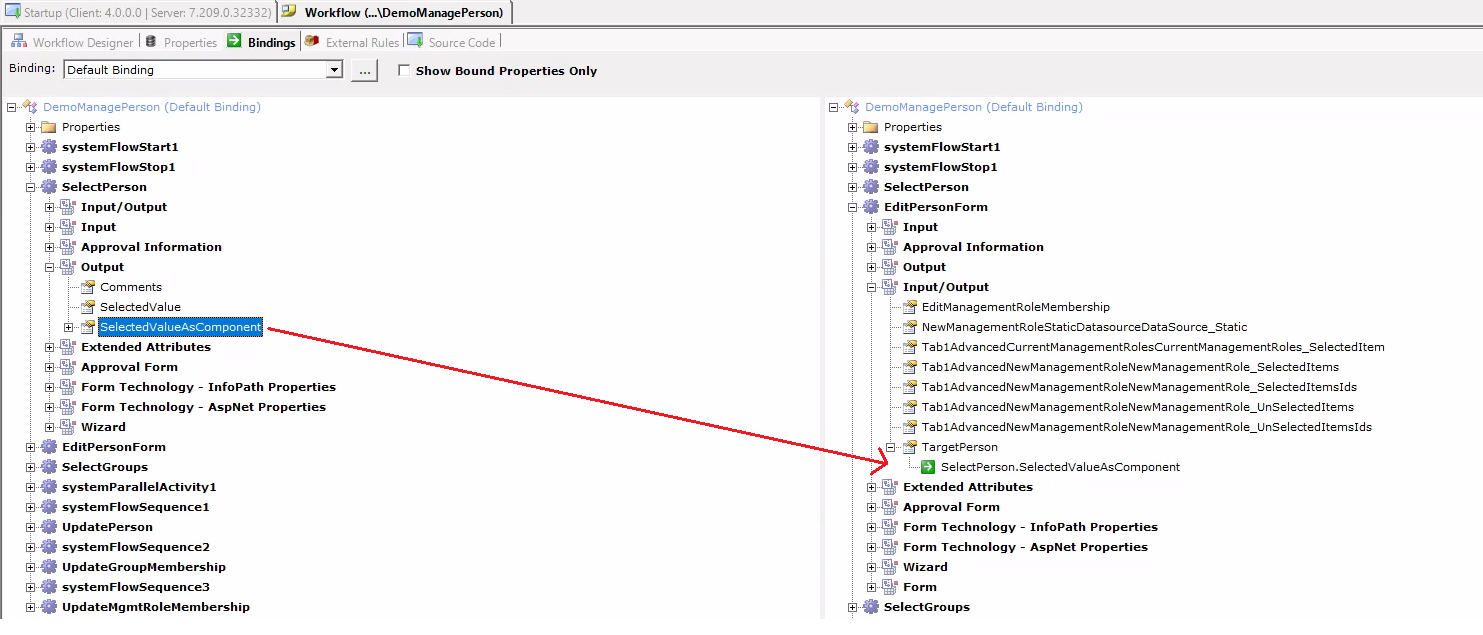
Go to the Bindings tab. Expand the SelectPerson, then expand the Output. Drag and drop the SelectedValueAsComponent onto TargetPerson inside the Input/Output of EditPersonForm.
-
Expand the EditPersonForm, then expand the Input/Output. Drag and drop the TargetPerson onto the Form_TargetPerson inside the Input of UpdatePerson.

-
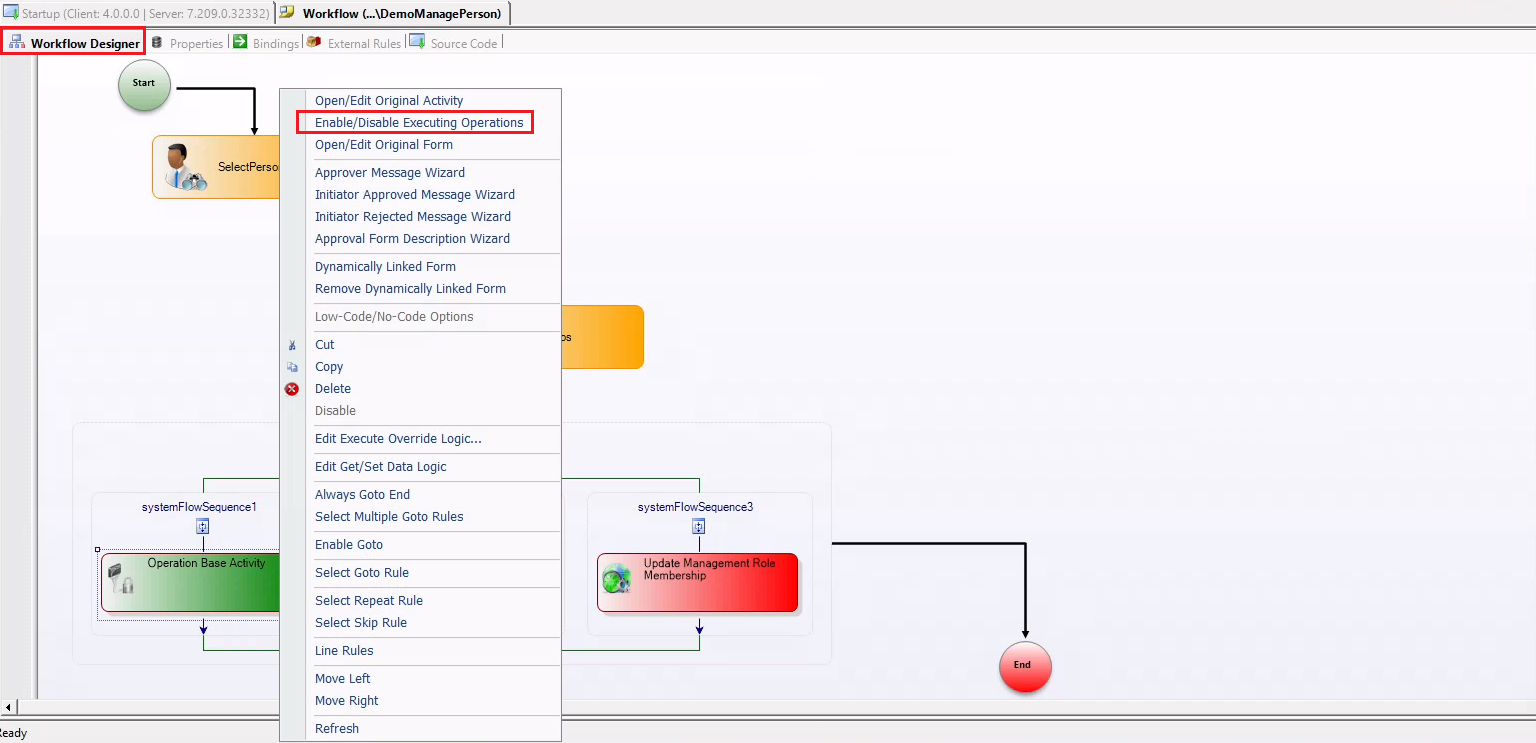
Go to the Workflow Designer tab right click on the Operation Base Activity and select the Enable/Disable Executing Operations option.
-
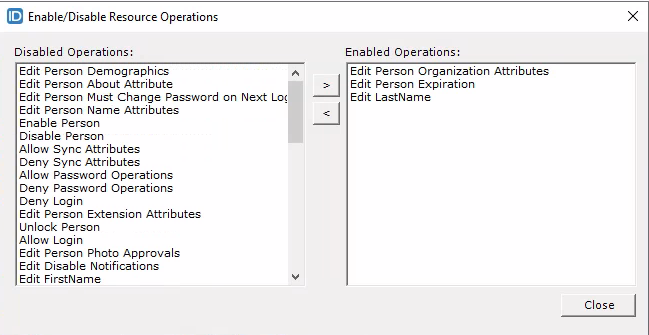
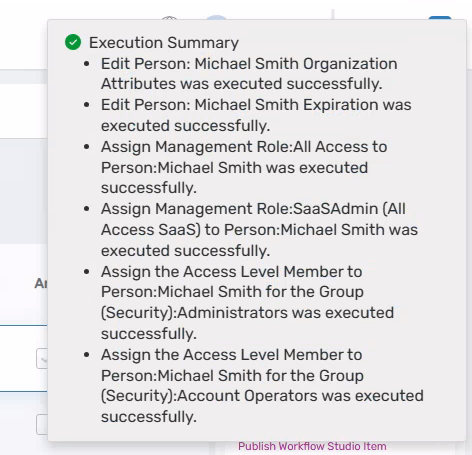
Move “Edit Person Organization Attributes”, “Edit Person Expiration” and “Edit LastName” from left to right. Click on the Close button.
-
Right click on the Update Group RBAC Membership Activity and click on the Edit Get/Set Data Logic.
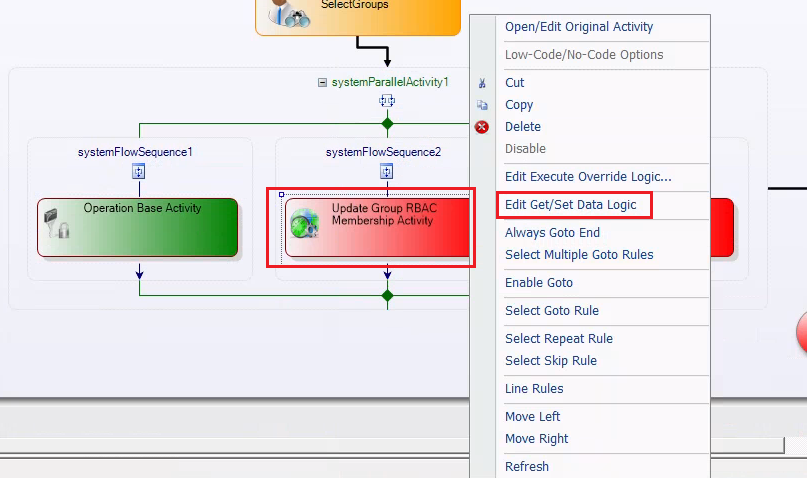
-
In the SetDataCode method write below code. In the code below, we are passing the list of Groups and the selected Person to the Update Group RBAC Membership Activity activity.
CurrentWorkflow.UpdateGroupMembership.TargetPersonToAdd = CurrentWorkflow.SelectPerson.SelectedValueAsComponent;
CurrentWorkflow.UpdateGroupMembership.TargetGroups = CurrentWorkflow.SelectGroups.SelectedValuesAsTList;
-
Right click on the Update Management Role Membership and click on the Edit Get/Set Data Logic.

-
In the SetDataCode method write below code. In the code below, we are passing the list of Management Roles and the selected Person to the Update Management Role Membership activity.
  CurrentWorkflow.UpdateMgmtRoleMembership.TargetManagementRoleToAddList =
     CurrentWorkflow.EditPersonForm.Tab1AdvancedNewManagementRoleNewManagementRole_SelectedItems;

  CurrentWorkflow.UpdateMgmtRoleMembership.PersonToAdd =
     CurrentWorkflow.SelectPerson.SelectedValueAsComponent;

-
Right click on the EditPersonForm and click on the Edit Get/Set Data Logic.
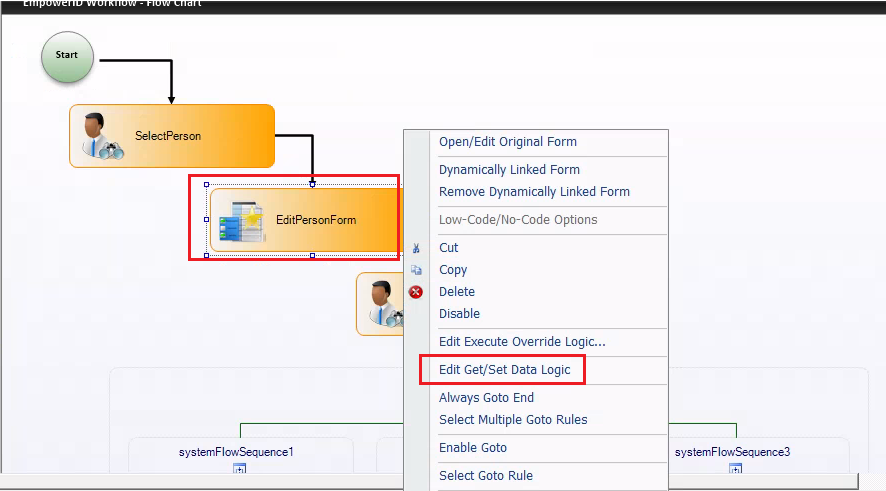
-
In the SetDataCode method write below code. The purpose of the code below is to display the management roles assigned to a person.
      CurrentWorkflow.EditPersonForm.DataSource_CurrentManagementRoleMembership_personID =
          CurrentWorkflow.EditPersonForm.TargetPerson.PersonGUID;

- In the SetDataCode method write below code. The purpose of the code below is to display the management roles in autocomplete control that has not been assigned to a person.
    CurrentWorkflow.EditPersonForm.DataSource_NewManagementRoleDatasource_personID =
			  CurrentWorkflow.EditPersonForm.TargetPerson.PersonGUID;

- Publish your workflow both in the from the Workflow Studio and in UI
- Publish all your lookup and forms in the EmpowerID Web
- Run your workflow and test it.
Testing the Workflow
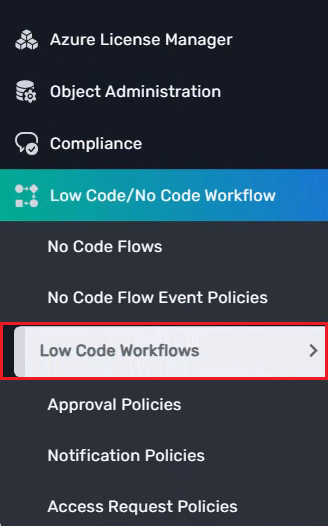
- Navigate to EmpowerID Web, proceed to Low Code Workflows, and search for your workflow. In our case, the workflow is named Demo Manage Person. Click on the link under the Run column to run the workflow.

-
First a lookup control appears click on the search button to load it with users or search for any specific user name by entering it in the search box, such as Michael Smith.
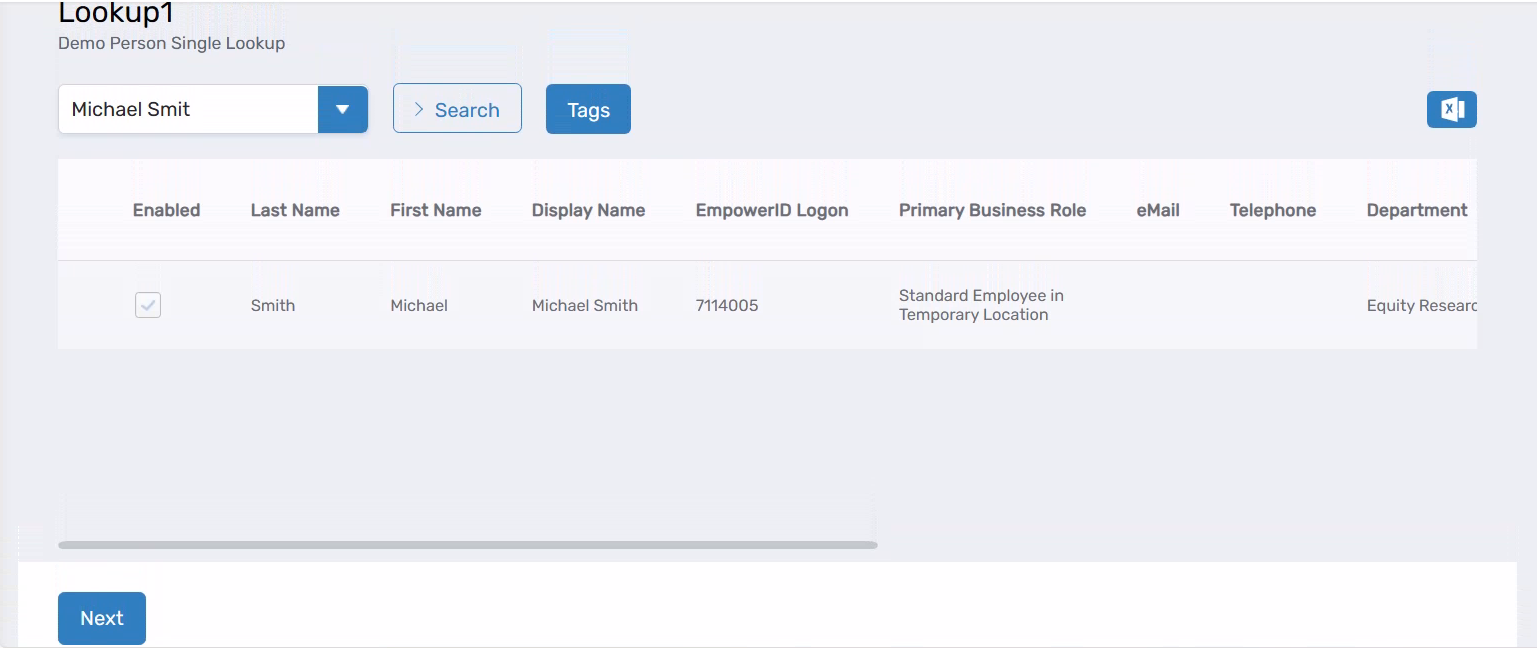
-
Select the first row and click on the Next button.
-
The form will be loaded with the attributes of the previously selected user (Michael Smith).
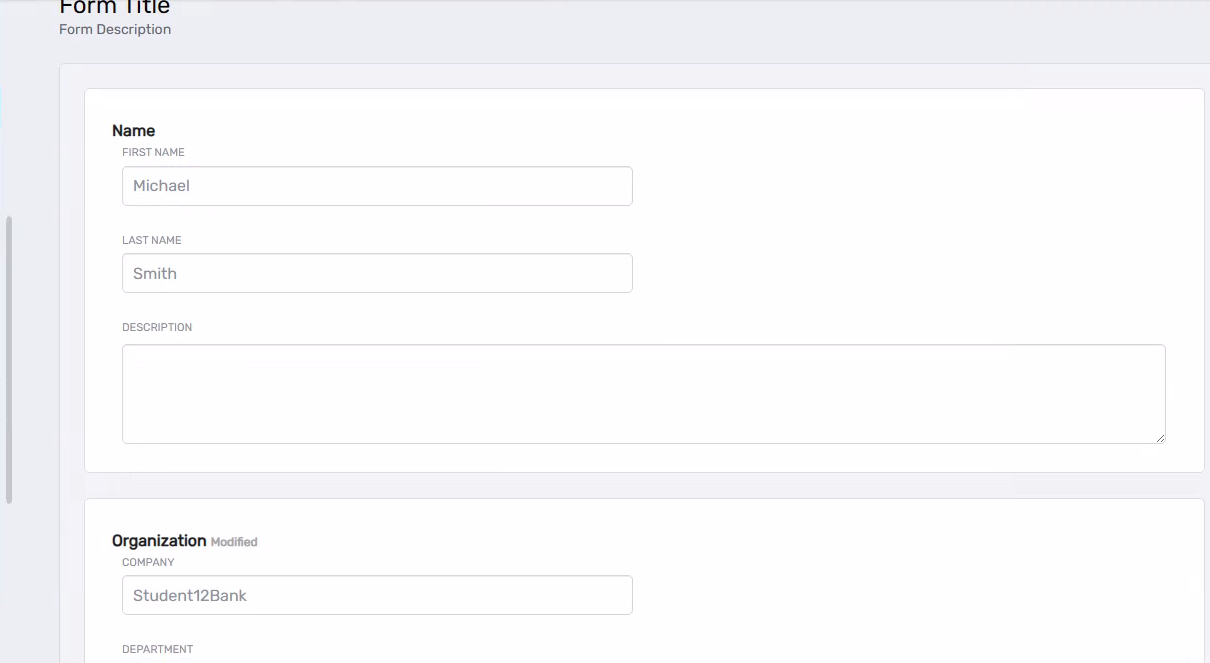
-
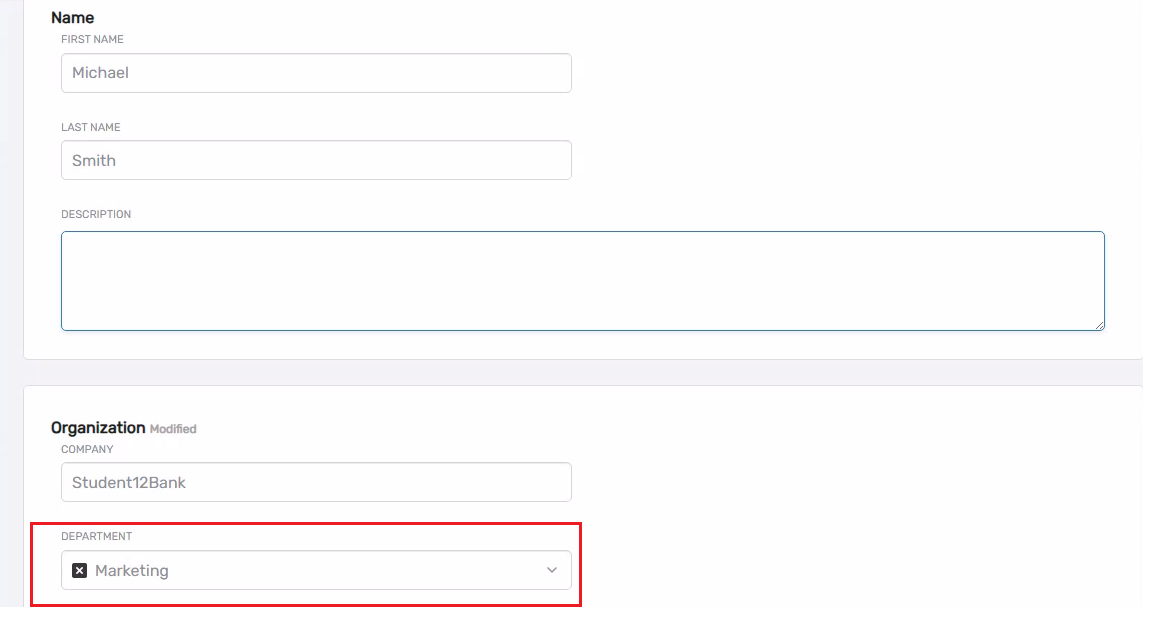
Select the department from the dropdown.
-
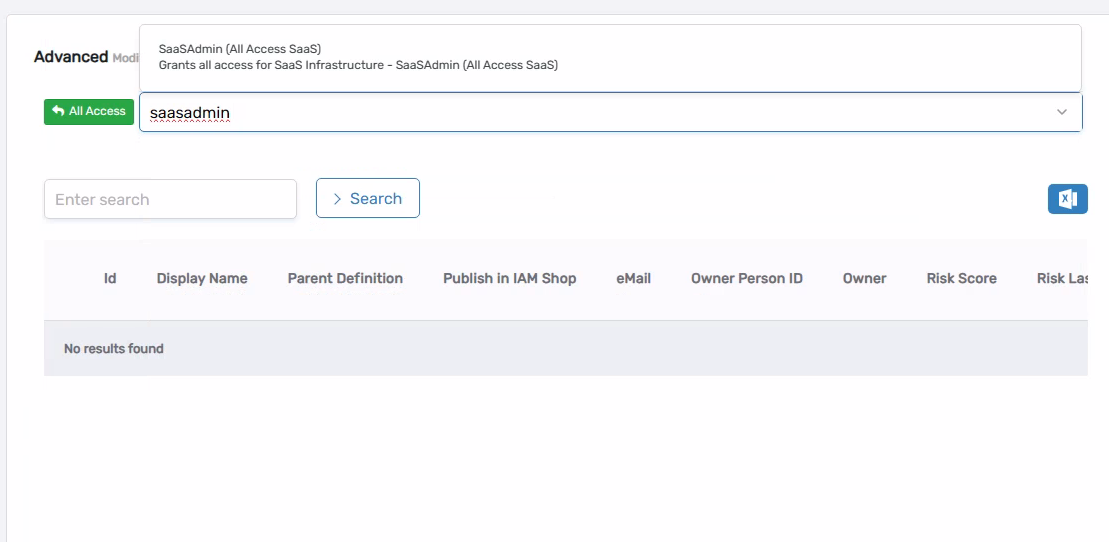
Click on Edit ManagementRoleMembership; it will make the Advanced section visible with an autocomplete control and DataGrid.

-
As of now, no Management Role is assigned to this user.
-
In the autocomplete control above, search for the management role and select it.

-
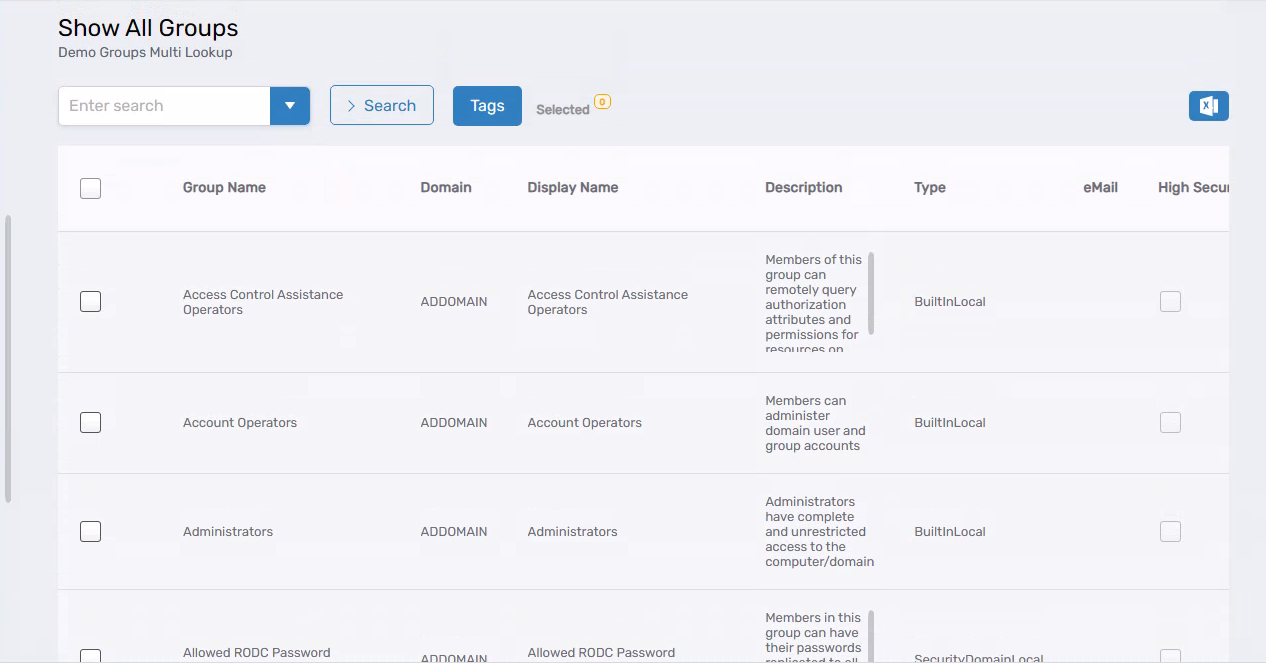
Click on the Next button. The Groups lookup control will appear. Click on the Search button to load the users.
-
Select any group in my case, I am selecting Account Operators and Administrators.

-
Click on the Submit button.
-
Here you can see the execution summary
-
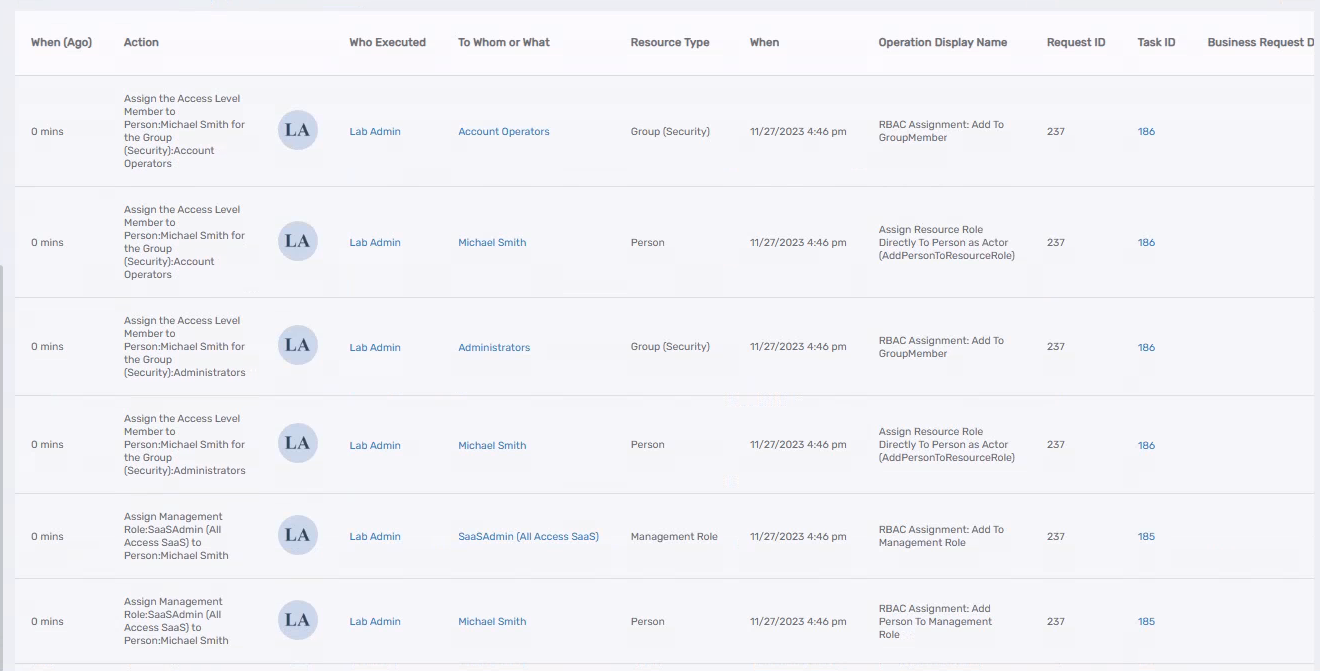
Go to System Logs → Audit Log and there you can see all the operations performed against the Michael Smith.
-
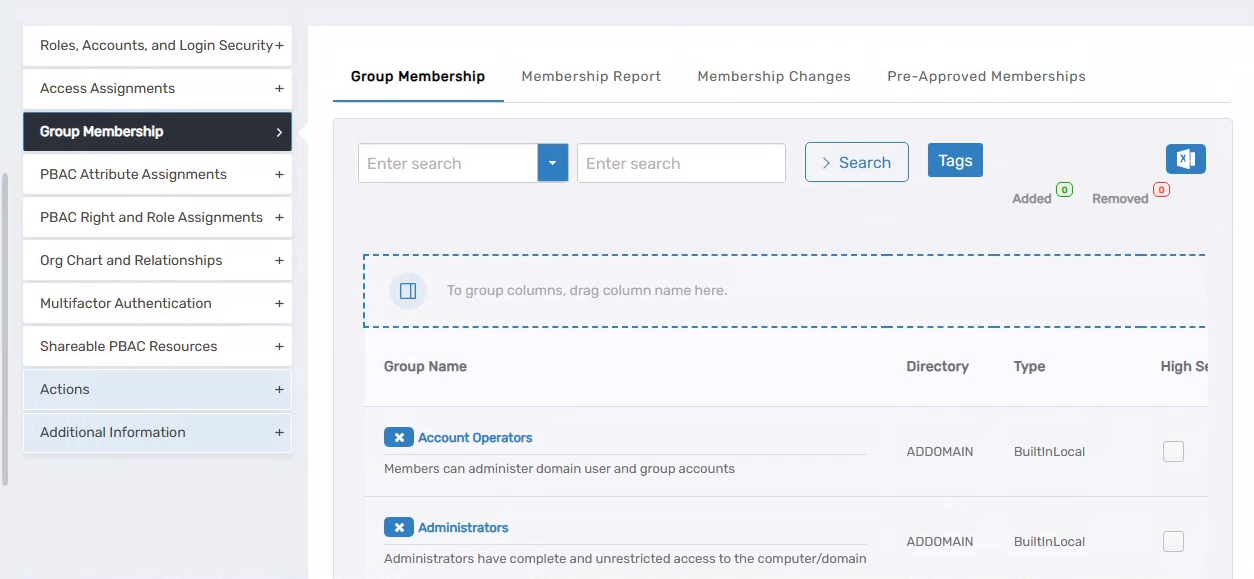
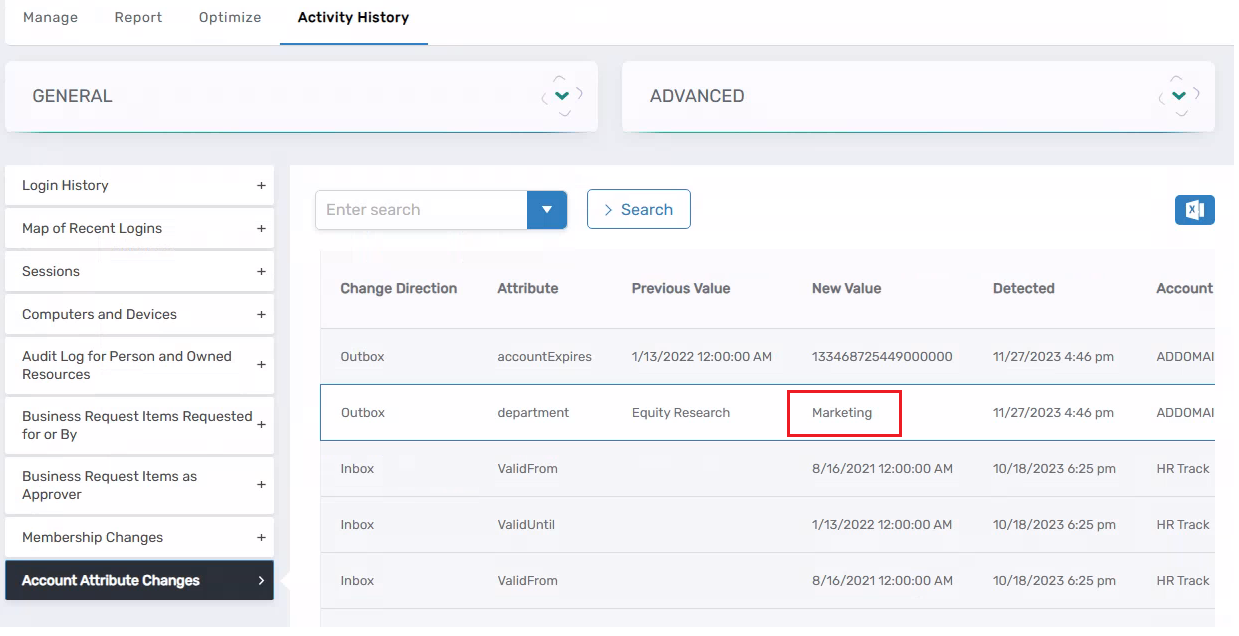
By going to the Michel Smith profile or, in your case, the user profile you selected, you can see its Group Membership and Account Attribute Changes.
-
You can re-run the workflow and search for the same user to see if the attribute has been updated and if the management role has been assigned.
-
END
Tasks
- Convert the above workflow to Wizard Workflow.
- Implement functionality to remove a person from groups and management roles.